
Are you hand typing your table of contents? Why? WHY? Are you a masochist? Or did you make one and hate the look of it? I got you. This week is all about automatic Tables of Contents in Word.
Generating a Table of Contents Automatically
Word can generate a table of contents (TOC) by recognizing styles in a document, for example, Heading 1, Heading 2, and Heading 3. Word searches for the styles indicated by the user/template and then inserts the table of contents into your document at your insertion point. This is one of the many reasons why styles are so important.
Levels in the TOC are based on hierarchical relationships in a tree structure. This is where we break a document down into categories and organize those groupings of information. When you create a table of contents this way, you can automatically update it if you make changes in your document. It won’t update by itself.
Word provides a gallery of automatic TOC styles on the References ribbon in the Table of Contents group. There is a minimum of two listed built-in automatic TOCs, a manual insertion option, online templates (not available to all), and you may create a custom table. Creating a custom TOC uses the options you choose and any custom styles you’ve applied by using the Table of Contents dialog box.

You also have the option of physically typing and formatting a TOC by searching yourself for page numbers and headers. I recommend this option for those individuals who hate their life, enjoy tedium, delight in making errors, relish frequent updates, and have loads of time on their hands.
The easiest way to create a table of contents is to use the built-in heading styles. You can also create a table of contents that is based on the custom styles that you have applied. Further, you have the option to assign the table of contents levels to individual text entries.
Mark entries to be included in the TOC by using heading styles bearing in mind the various outline levels of the TOC. Once you mark all the entries for your table of contents you are ready to build.
Place your cursor at the insertion point of your TOC. On the References (1) ribbon in the Table of Contents group, click Table of Contents (2). Then choose Custom Table of Contents (3).

The Table of Contents dialog box will appear.
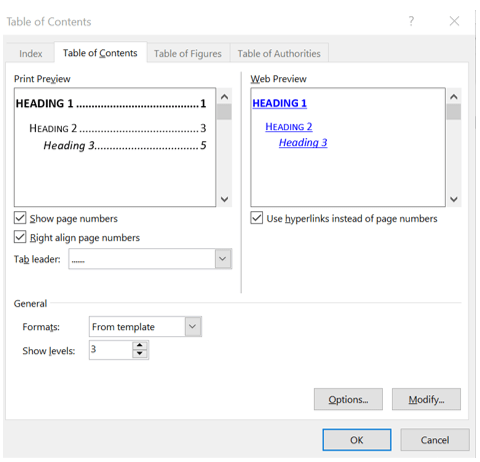
In this dialog box on the Table of Contents tab (other tabs discussed later), you can perform any of the following tasks.
- Change how many heading levels are displayed in the TOC. Enter the number of subheader levels to display in the Show levels box in the General section near the bottom.
- Change the overall look of the TOC by selecting a different format from the Formats drop-down list, also in the General section near the bottom. You can see what your choice looks like in the Print Preview and Web Preview areas at the top.
- Change the type of line (dotted, dashed, solid, none) that appears between the entry text and the page number. Select the desired option from the Tab leader drop-down list under Print Preview.
- Check and uncheck options to display page numbers and if those numbers line up on the right under the Print Preview.
- Items in the TOC can be hyperlinked so viewers of the document can click directly to a section rather than exercising their scroll wheel. The checkbox for this is automatically checked under Web Preview.
- Change the font options of TOC styles by clicking Modify in the bottom right corner. The Style dialog box will display. Select the TOC level that you want to change, and then click Modify.
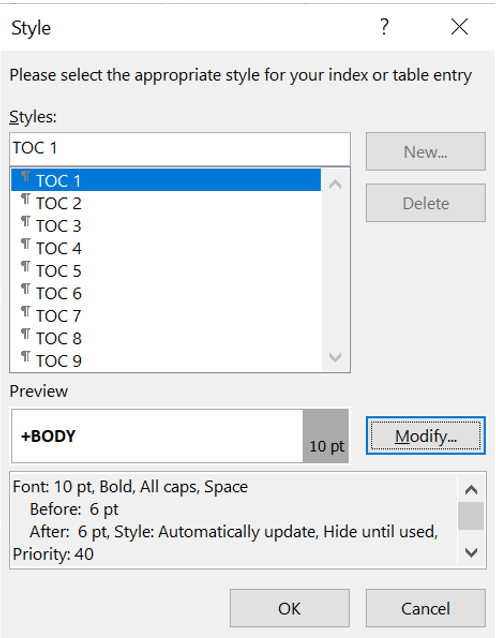
The Modify Style dialog box will display. (This looks and acts like the Create New Style from Formatting dialog box.) Do not change items in the Properties section. Use options in the Formatting section to change the font, the font size, and the amount of indentation.

To utilize custom styles from your document in the TOC, click Options in the bottom right corner of the Table of Contents dialog box.
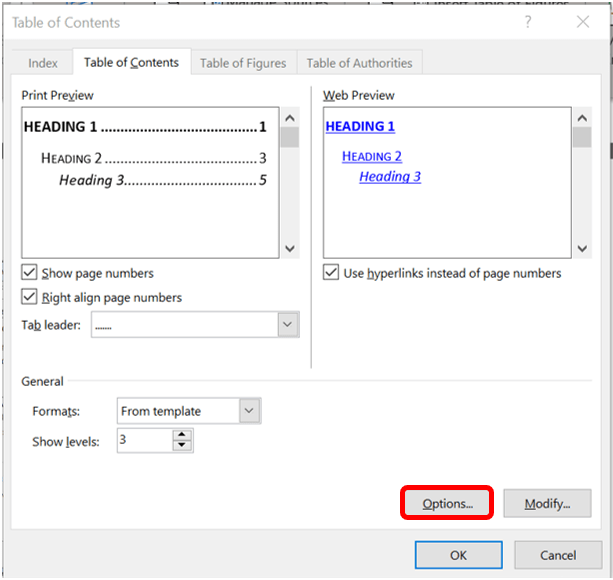
The Table of Contents Options dialog box will display. Under TOC level, next to the style name, type a number from 1 to 9 to indicate the level you want the heading style to represent. If you want to use only custom styles, delete the TOC level numbers which auto-populate from the prebuilt styles, such as Heading 1. Click OK.

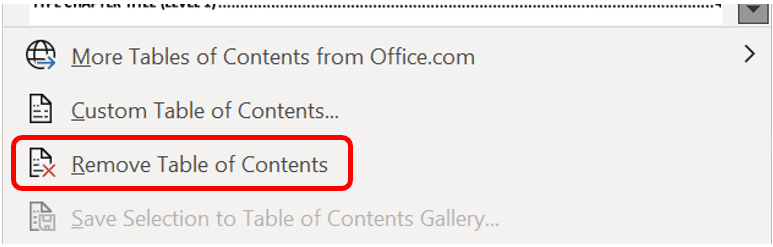
Deleting a Table of Contents
Decided you don’t need the TOC or want to scrap it and start over? On the References ribbon in the Table of Contents group, click Table of Contents. Click Remove Table of Contents.
My next post will discuss how to quickly update the TOC without having to start from scratch.

One response to “Creating a Table of Contents”
[…] like the Table of Contents, are based on hierarchical outline levels in a tree structure. There are two ways to change levels […]
LikeLiked by 1 person