Like so many things in Word, how you view track changes is highly customizable. Today’s post will be long due to detail.
Does the color red upset you? Are you colorblind and having trouble telling reviewers apart based on color? Do you not care about formatting changes and are sick of seeing them notated? If you need to customize any aspect of Track Changes go to the Review ribbon and in the Tracking group click the launcher.
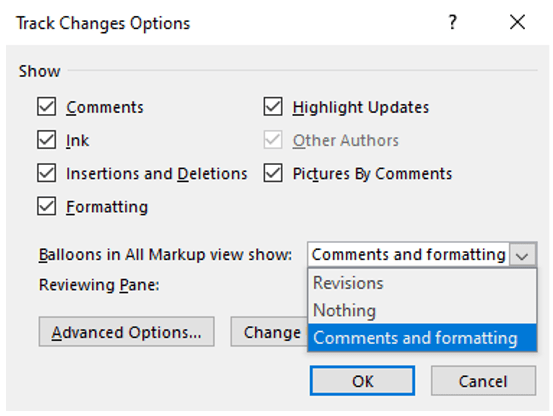
You will then be presented with, drum roll, the Track Changes Options dialog box.

Click off the options you don’t want to track.
Notice you may also alter what appears in those tracking balloons. Click the drop-down menu for the following options.
- Revisions: Looks and acts a lot like Comments and formatting but if you delete something, rather than seeing the edit inline, it will disappear from the page while being marked in a balloon.
- Nothing: No balloons at all. All changes are noted in the revision pane.
- Comments and Formatting: Edits are all made inline on the page while formatting changes are noted in balloons along with comments.
Note: If you’re looking at that image and saying to yourself, “What is ink?” It’s a “natural gestures” option for tablet users to write with a digital pen rather than use a keyboard. This is not normal for most office workers, and therefore will not be covered here.
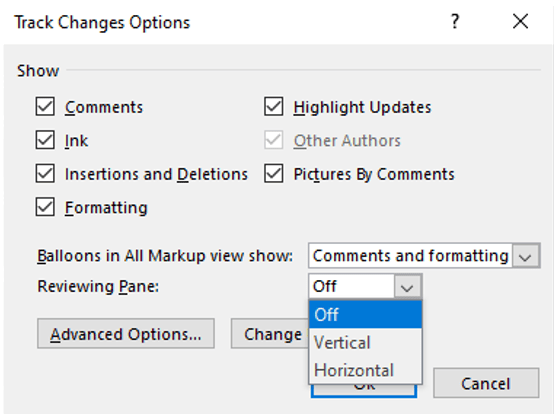
From this window, you may also toggle the Reviewing Pane on or off. Use the dropdown menu to toggle and set how on the screen it will appear.
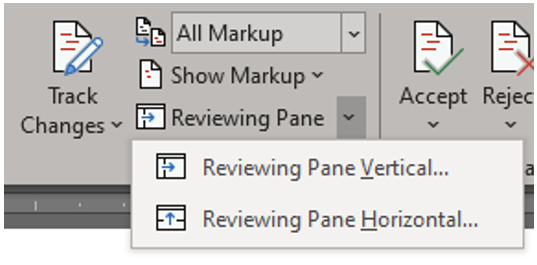
You don’t have to change the Reviewing Pane here. On the Review ribbon, in the Tracking group, click the dropdown to toggle on and set how the pane will appear.
Now if you have too many author colors making you go blind, or you want to alter how changes appear, or maybe the size of the balloons, in that dialog box click Advanced Options to open one of the two versions below of the Advanced Track Changes Options dialog box.

I show you two versions of this window because depending on the size of your screen the section headers may not appear.
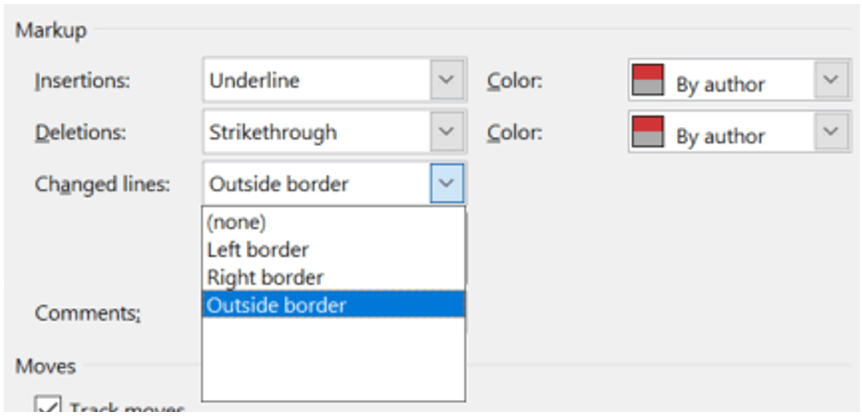
Under the Markup section, you can change the formatting of a particular type of markup by choosing an option from the dropdown menu next to that type. By default, Word assigns a different color for each reviewer’s insertions, deletions, and formatting changes. Assigned colors may change when the document is closed and reopened or when someone opens it on another computer. You can’t choose which color Word assigns to reviewers, but you can choose colors for different types of markups. If you prefer to have colors determined by the type of markup instead of by author, select a color from the dropdown menu provided in the Markup section.

If you don’t like seeing the standard strikethrough on the deleted text you can change this in the Deletions dropdown.

If you’ve ever noticed a line that sits just to the left of your text whenever you’ve made a change, that line is the Changed lines border (yep, a name for everything) which in the dropdown you can move where it appears or if it appears at all. Outside border is the default.
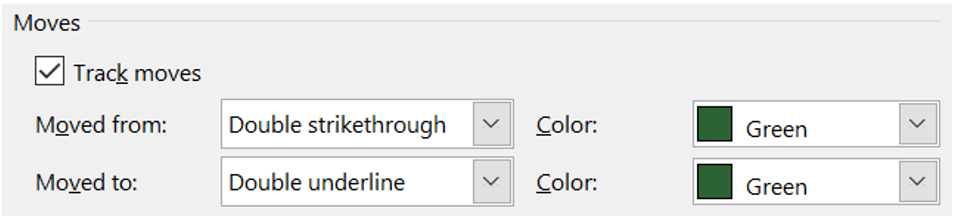
Under Moves, enable the Track Moves options to make Word record movement of content across the document. You can further customize the way Word shows any recent movements of content. You will be able to observe if the content is Moved from or Moved to somewhere else in the document, by selecting different colors.
From Table cell highlighting, you can observe changes in tables, if someone inserts cells or deletes cells in the table, etc. Select different colors for respective actions.

If you don’t like the standard strikethrough of old text or the bright red of new text, click Track formatting in the Formatting section. Click it off if you don’t want to record formatting changes. Select the type of formatting you want to observe and select a color to distinguish formatting changes from other tracked changes.

Under Balloons, you can set the width of the balloons by typing in your Preferred width or change Measure in from Inches to Percent and set a percentage of the paper that you want the balloons to cover.
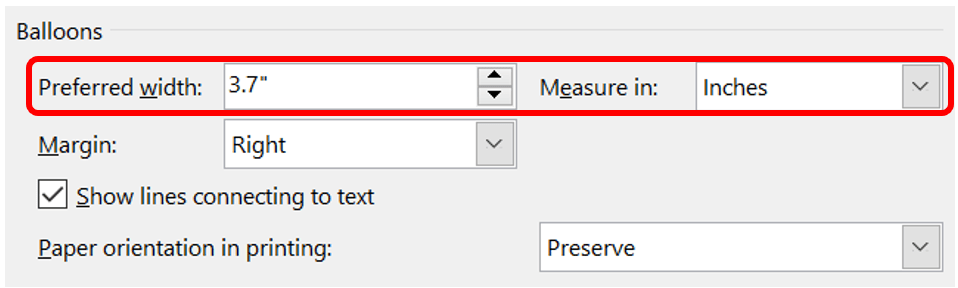
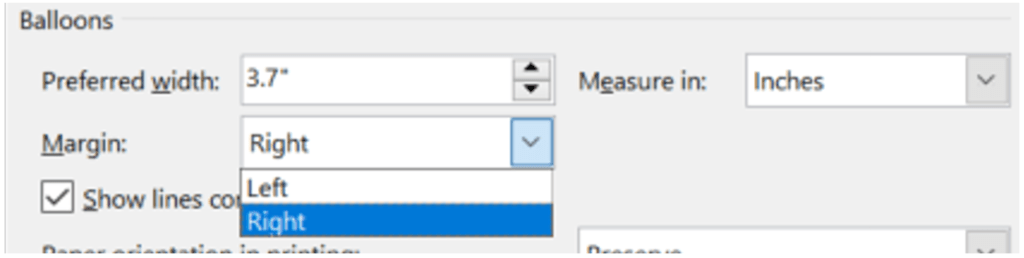
If you prefer balloons to be on the left rather than the standard right, you can choose from the dropdown here. The checkbox here allows you to remove lines connecting balloons to text.
Finally, if you want to print a version of your document that displays tracked changes know that Word will shrink the document in size to fit the sidebar with comments. If you don’t want all your text minimized to fit the change balloons, under Paper orientation in printing you can Force Landscape.

This will change the number of pages in your document. The three options in the dropdown are:
- Auto: Allows the computer to adjust the orientation based on content
- Preserve: (Default) Maintains what the user setting for document orientation in a document
- Force Landscape: Prints in landscape mode when printing with track changes.
