If you want your tab stops at precise positions or if you want to insert a specific character (leader) before the tab, use the Tabs dialog box.
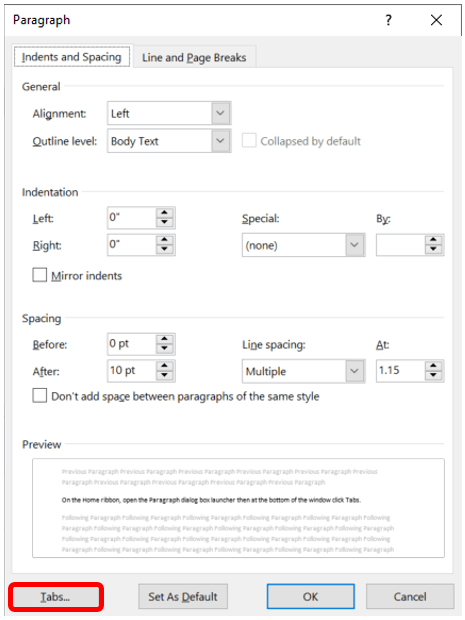
On the Home ribbon, open the Paragraph dialog box, then at the bottom of the window, click Tabs.
The Tabs window will open. Under Tab stop position, type the location where you want to set the tab stop. Do not press Enter if you have other edits. This will set the tab stop without letting you edit further. Note that the default is every half inch. In the example below, I have added left tab stops at three-quarters of an inch, and one is being created for one and one-quarter inch. Under Alignment, click the type of tab stop you want. To add dots with your tab stop or to add another type of leader, click the option you want under Leader. The default is None. If you are building a form and want blank lines for people to write, option 4 would be a good choice.
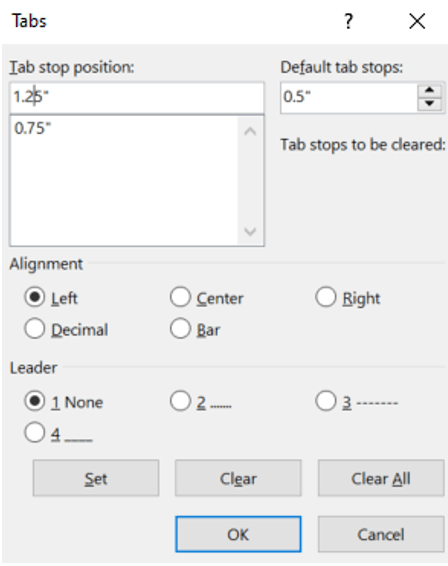
Click Set if you plan to set multiple tab stop positions and types. Repeat the previous steps to add another tab stop. Click OK when you are done.
Clearing a Tab Stop
If you added tab stops you later want to remove, you can place your cursor in the paragraph where you want them removed, then pull the marks down off the ruler. You may also remove the tab stop by opening the Paragraph dialog box, click Tabs at the bottom. In the list under Tab stop position, click the tab stop position you want to delete and select Clear. If you want to remove the spacing from all manual tab stops, select Clear All.
