
First, let’s understand what full-bleed, zero-margin, edge-to-edge printing means. If you’re unfamiliar with these terms, that’s ok. It means you’ve never worked in graphics or with professional printers. It also means that it is highly likely that despite setting your margins to zero, the printer you are working with will still give you a white border. Don’t worry, you don’t need expertise in printing, and we’re going to keep this explanation very, very simplistic. Here’s a secret: Printers don’t actually print to the edge. Even when you tell it to print to the edge. It would be messy, leaving ink to smear on successive pages. That fancy print house you hired to create brochures where the image goes to the edge, had a border originally. The special skill was to print beyond the brochure’s actual paper size, and then they cut the paper down to the specified size. Their margins were for larger paper. You can’t do that, even with your fancy office printer (that you likely want to take a baseball bat to, most days). So, while some of that info is superfluous, it is important to know that your printer always expects a white border, which the computer and printer view differently than margins.
Word allows printing headers and footers in the top and bottom margins. If the header or footer is too large to fit within the margin and would cross the border (so to speak), Word adjusts the top and bottom margin to accommodate the header or footer. In other words, if the header or footer becomes too large vertically to fit in the margin, it starts expanding downward (for the header) and upward (for the footer), reducing the amount of text that can be displayed in the body of the document, squeezing the image to a smaller size, or layering your header/footer over the body text of the document.
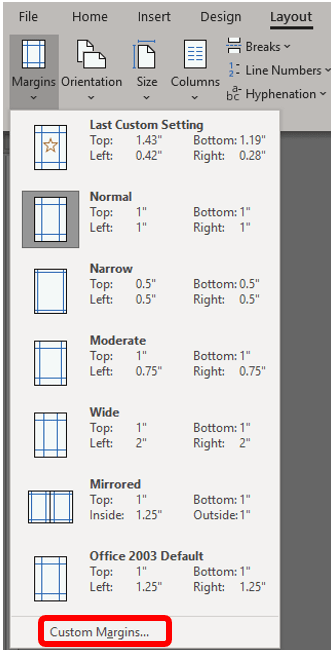
To control the margins, go to the Layout ribbon, and click Margins in the Page Setup group.

A dropdown menu will appear that will allow you to adjust the margins either by presets or, if you want to customize by manually entering your margin sizes, choose Custom Margins at the bottom.
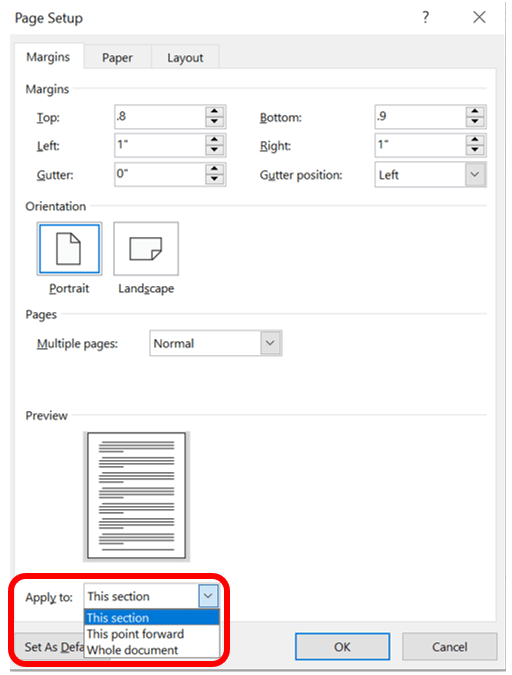
The Page Setup dialog box will appear and will open on the Margins tab. From here, enter your dimensions applying either to the section you are working in or to the entire document.
Remember, if the header or footer is too large, it may superimpose on the main document text.
