Headers and footers can be as simple as the inclusion of the document title and a page number, but you can also create headers and footers that contain graphics, multiple paragraphs, and fields. You can specify a different header or footer for odd and even pages or use a different header or footer for the first page of a section or document. If you divide a document into sections, you can use different headers and footers in each section. For example, you might want the header for each section to reflect the title of that section or chapter. So many options.
Adding and Removing Headers and Footers
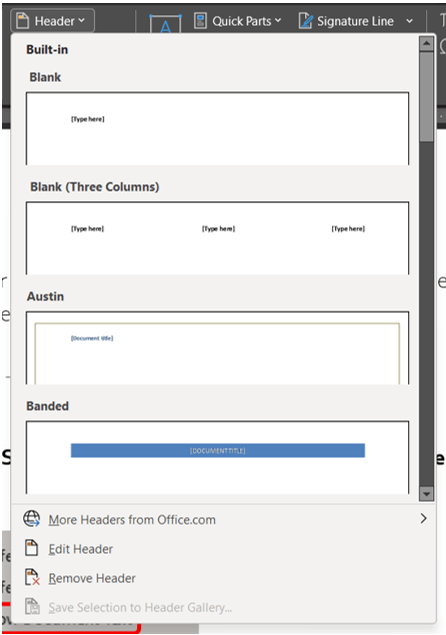
There are two ways to create a header or footer. One option is to click Header or Footer options on the Insert ribbon in the Header & Footer group.

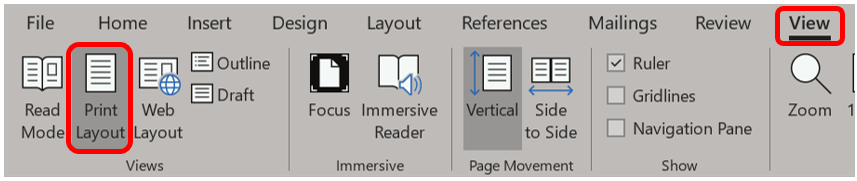
As an alternative, you can double-click the header/footer space within the document to open the Header & Footer Tools toolbar/tab. This will switch the document to Print Layout view if not already in that view.

To ensure you are in Print Layout view, go to the View ribbon, then click Print Layout. The headers and footers will be visible but appear dimmed.
Once inside a header/footer, to switch between the header to the footer or vice versa, either click into the header/footer or click the Go to Header/Footer button on the toolbar. The one you are not in will be darkened, and the one you are in will be grayed out.

A non-printing dashed line encloses the header and footer areas along with an identifying label. Text and graphics in the document are visible but dimmed when outside the header/footer.

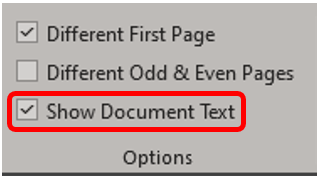
To display or hide the document text, click the Show/Hide Document Text button on the Header & Footer toolbar.
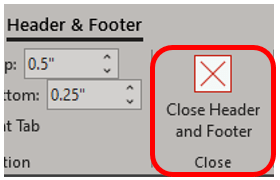
You can type and format text in the header or footer area in the same way as in the main document. After you have created your header or footer, click Close on the Header & Footer toolbar to return to the main part of the document or double click the main document text area.